Wednesday, March 30, 2016

Pineapple Chicken Fried Rice

I would eat this dinner everyday if I could! There are so many delicious flavors in this meal. Not only is it delicious, it is quite easy to make, but looks so fancy! It is important to wait for the pineapples to fully ripen, or else they will be to firm to eat. They are ripe when they are mostly yellow rather than green. 
I made this for Easter dinner this year; since my brother is allergic to mammal meats, I can't roast a leg of lamb, pork, or beef. But I am not complaining, because this dinner was absolutely perfect! This meal will definitely make a re-appearance in the future!
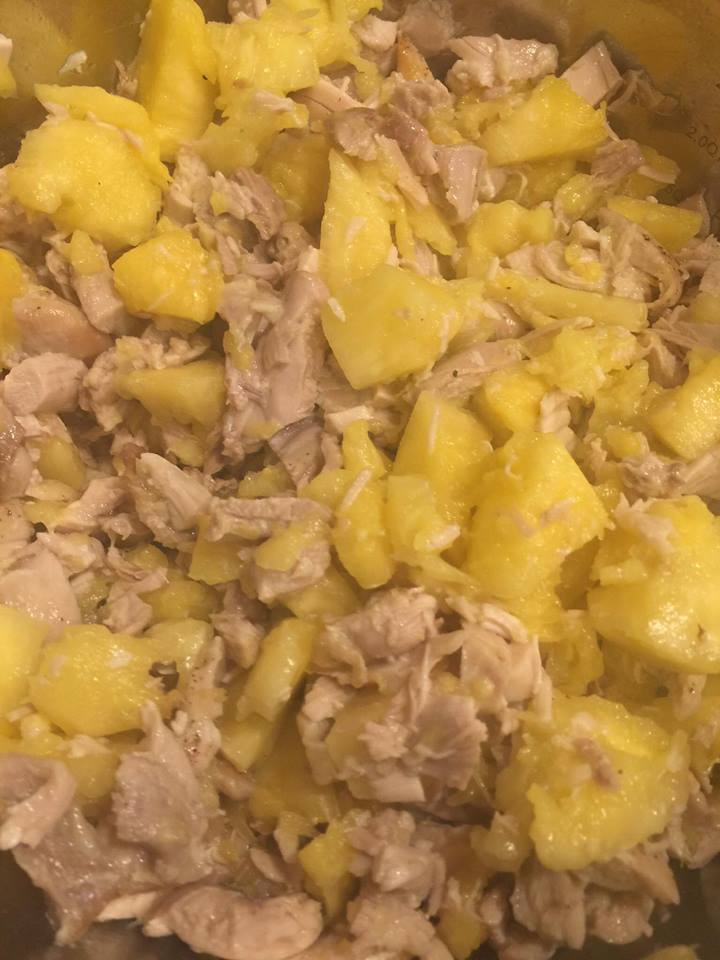
Cooked chicken with fresh diced pineapple #deliciousness
Sauteing the vegetables!
Let's get to cooking!

Pineapple-Chicken Fried Rice
  • 1 lb chicken thighs
  • 3 cups jasmine rice
  • 1 cup diced carrots 
  • 4 eggs
  • 2 whole pineapples, sliced lengthwise, and some pineapple scooped out and diced (reserve chunks and juice)
  • 1/2 cup coconut aminos 
  • 1 tablespoon raw honey
  • 1 tablespoon sriracha 
  • 1 tablespoon fresh ginger, diced
  • 1 onion, medium diced
  • 3 garlic cloves, minced
  • 1/2 cup pineapple juice
  • salt and pepper, to taste
  • coconut oil, to coat pan
Preheat oven to 400 degrees. Line a baking sheet with parchment paper. Season chicken thighs with salt and pepper. Place in oven and roast for about 40 minutes, or until fully cooked. Bring 5 cups of chicken stock to a boil. Once boiling, add jasmine rice and cook for 16 minutes, covered, until rice is fluffy and chicken stock is absorbed.

Whisk together coconut aminos, raw honey, sriracha, ginger, and pineapple juice in a small bowl. Set aside. 

Heat coconut oil in a large pan over medium-high heat. Once hot, add onions, garlic, and ginger. Saute for about 2 minutes, and then add in carrots. Cook over medium heat until carrots are softened. 
Once the chicken thighs have finished cooking, once cool enough to handle. dice into chunks. Add to pan with carrots, along with fresh pineapple chunks. Crack in eggs on at a time. Once the eggs have finished frying, add in cooked rice. Once all of the vegetables, pineapple chunks, chicken, and eggs are thoroughly combined with the rice, pour in sauce. Let continue frying until sauce is absorbed. Enjoy!!

-Juliet

Monday, March 28, 2016

Dairy-Free French Silk Pie with Banana Flour Crust

This pie is pure bliss. The chocolate filling is so silky and delicious! It is rich, but not too rich to where you feel full after the first bite; it is creamy and light! The pie crust is SO perfect, the crust stays together, and has a great crisp texture. Banana flour, which is a gluten free and grain free flour, is the only flour used in the crust. It works wonderfully!
Traditional French silk pie uses butter and milk in the ingredients, but instead, I used coconut milk and coconut oil making this French silk pie not only gluten-free, but dairy-free as well! You will not taste any coconut flavor, since there is so much dark chocolate in the pie! 
Before baking the banana flour pie crust..
After baking pie crust and filling with chocolate!
Onto the recipe!

Dairy-Free French Silk Pie with Banana Flour Crust

  • 10 ounces dark chocolate chips
  • 14 ounces coconut milk 
  • 3 eggs yolks
  • 2 tablespoons coconut oil
  • 1/4 cup coconut sugar
  • 1 cup WEDO banana flour 
  • 4 tablespoons shortening 
  • 1 cup water
  • pinch of salt 
  • 1 tablespoon coconut sugar
  • coconut whipped cream and shaved dark chocolate to garnish (optional)
Preheat oven 400 degrees. Grease an 8 inch pie pan with coconut oil. 

First, we are going to make the pie crust. Mix together banana flour, salt, sugar, and shortening until crumbs form. Add in water and stir until it turns into a firm dough. Roll out dough on a surface sprinkled with flour, then transfer to pie pan. Seal edges with a fork and prick the bottom of crust with a fork as well. Bake for about 12 minutes, or until crispy and slightly golden.

While the crust is cooling, we are going to start making the filling! Over medium heat in a medium saucepan, melt together dark chocolate and coconut milk. Once the the chocolate is melted with coconut milk, whisk in egg yolks one at a time. 

Beat together 2 tablespoons of coconut oil with coconut sugar in a stand mixer until combined. Pour in melted chocolate/coconut milk mixture while hot. Mix until everything is thoroughly combined. Pour into cooled pie crust and place in freezer for at least 4 hours, then place in fridge until ready to serve. Top with coconut whipped cream and shaved dark chocolate, and devour! Enjoy!

-Juliet


Wednesday, March 23, 2016

Caribbean Jerk Marinated Chicken topped with a Tropical Banana Sauce, side of Tostones, & Cilantro-Lime Cauliflower Rice

My goodness, this dinner is total perfection. This meal is packed with huge amounts of flavor; the savory spiced caribbean jerk chicken is paired with the sweet tropical sauce, and then it's paired with crispy fried plantains (tostones) and cilantro lime cauliflower rice. I could go on and on about this blissful meal! 
This dinner is full of so many tropical flavors, you won't be able to tell that this meal is good for you! The cauliflower rice is just cauliflower riced through a food processor, which makes it a low carb and grain free rice alternative. 
After marinating, going into oven....
After getting cooking and getting crispy in the oven! #yum!
 Let's get to cooking!

Caribbean Jerk Marinated Chicken topped with a Tropical Banana Sauce, side of Tostones, & Cilantro-Lime Cauliflower Rice

Chicken Ingredients:
  • 1 lb chicken drumsticks
  • 1/2 teaspoon cinnamon 
  • 1 teaspoon allspice
  • 1 teaspoon cayenne pepper
  • 1 teaspoon paprika 
  • 1 cup coconut aminos 
  • 2 tablespoons minced fresh ginger
  • 3 garlic cloves, minced
  • salt and pepper, to taste
Sauce Ingredients:
  • 3 garlic cloves, minced
  • 1 onion, medium diced
  • 1 tablespoon minced fresh ginger
  • 1/2 tablespoon raw honey
  • 1 cup orange juice
  • 1/2 cup pineapple juice
  • 1/3 cup banana liquor 
  • 2 ripe bananas, sliced
  • 1 tablespoon WEDO banana flour
  • salt and pepper, to taste
Cauliflower Rice Ingredients:
  • 2 heads of cauliflower, riced 
  • 1/2 cup chicken stock
  • 2 tablespoons avocado oil
  • 2 tablespoons lime juice
  • 1/4 cup freshly chopped cilantro
Tostone Ingredients:
  • 2 green plantains, peeled and sliced
  • coconut oil to coat pan
  • salt and pepper, to taste

You will need to marinate the chicken overnight. Season chicken drumsticks with cinnamon, allspice, cayenne pepper, paprika, salt, and pepper. Place in a large ziplock bag and pour in coconut aminos, ginger, and garlic. Shake until all drumsticks are coated. Place in fridge overnight.

Preheat oven to 375 degrees. Line a baking sheet with parchment paper. Spread out marinated chicken drumsticks on sheet and bake for about 1 hour, or until crispy and fully cooked.

While the chicken is cooking, we are going to start making the cauliflower rice, tostones, and tropical sauce! Heat olive oil in a saucepan over medium heat. Once hot, add in riced cauliflower. Now pour in chicken broth, cover and let cook for about 7 minutes. After 7 minutes, remove lid and let finish cooking for another 7 minutes. Stir in lime juice and cilantro.

Time to start making the sauce! Add coconut oil to a large pan over medium high heat. Once hot, add in garlic, onion, and minced ginger. Saute for about 3 minutes, then add in sliced bananas, banana flour, and honey. Once caramelized, pour in orange juice, pineapple juice, and banana liquor. Let boil unto reduced into a slightly thick sauce. Add sauce to a blender and blend until smooth. Pour back into pan. Once the chicken drumsticks have finished cooking and are crispy, remove from oven and add to sauce. Coat drumsticks.

Lastly, we are going to fry up the plantains! Heat coconut oil in a pan over medium high heat. Once hot, add in sliced plantains. Fry on each side for about 3 minutes, flip and cook for another 3 minutes. Remove and place on a cutting board. Using the bottom of a plate, smash the plantains into tostones. Once all plantains are smashed, remove to oil and fry on each side for about 2 minutes or until crispy.

Time to plate! Plate on cilantro rice, top with chicken, sauce, and then add plantains to the dish. You can garnish with fresh chopped cilantro. Devour and enjoy!!

-Juliet 

Monday, March 21, 2016

Cinnamon-Cranberry Chocolate Chunk Granola

Sometimes you just want cereal or granola for breakfast/snack, but unfortunately, most of the cereals and granola you buy in stores aren't good for you and don't supply any health benefits. Well, I was craving good ole granola and decided to try making my own! I grabbed oats, banana flour, coconut oil, maple syrup, and a few other ingredients, and then I started experimenting! The result turned out perfectly; crisp, slightly sweet, and full of flavors!
This cinnamon-cranberry granola with chocolate chunk pieces is absolutely delicious! You also get a slight coconut flavor thanks to the coconut oil, which taste so delicious! Coconut oil contains fatty acids, improve cholesterol levels, and helps burn fat/boost metabolism. You will feel energized and ready to seize the day after eating this granola!

Onto the recipe!

Cinnamon-Cranberry Chocolate Chunk Granola (makes 6 cups)

  • 6 cups old fashioned rolled oats
  • 1/2 cup melted coconut oil
  • 1/2 cup pure maple syrup
  • 1/4 cup coconut sugar
  • pinch of salt
  • 1/2 tablespoon cinnamon
  • 1/4 cup sunflower seed butter
  • 1 tablespoon WEDO banana flour 
  • 3/4 cup dried cranberries
  • 1/2 cup roughly chopped dark chocolate 
Preheat oven to 325 degrees. Line a baking sheet with parchment paper.

First, stir together oats with cinnamon, salt, and banana flour. Then stir in maple syrup, coconut oil, sunflower seed butter, and dried cranberries. Spread onto parchment paper lined baking sheet. Bake for about 25  minutes, then stir and bake for another 25 until crispy.

Once the granola has cooled, break into chunky pieces. Pour into a bowl and mix with chopped dark chocolate. Serve and enjoy!

-Juliet

Friday, March 18, 2016

Seared Duck over Gluten-Free Carbonara Pasta

This dinner is absolutely delicious! The seared duck breasts are so crispy, and the pasta is so creamy and flavorful! The pasta requires minimal ingredients, and is super easy to make! It is important to get the duck fat really crispy before transferring to the oven, because it will render the fat better and taste really amazing!

Not only is this dinner delicious, easy, and quick to make, but it is pretty healthy for you as well! I used brown rice pasta instead of traditional non-gluten free pasta, and I cooked the duck breasts in avocado oil! Avocado oil is a great source of oleic acid and vitamin E. 

Onto the recipe!

Seared Duck over Gluten-Free Carbonara Pasta (serves 4)

  • 2 duck breasts 
  • 14 ounces brown rice pasta
  • 1 cup diced duck bacon (or turkey, pork, etc.)
  • 2 scallions, sliced (white and green separated)
  • 4 garlic cloves, minced
  • 4 large eggs
  • 1/2 cup grass-fed cheese
  • 1 teaspoon cayenne pepper
  • salt and pepper, to taste
  • avocado oil, to grease pan 
Preheat oven to 450 degrees. Bring a pot of water to a boil. Score duck skin with a knife. This helps to render the fat more quickly while cooking. Season with salt and pepper. Whisk together eggs and cheese. Set aside.

Lightly coat a cast iron with avocado oil and bring to medium-high heat. Once oil is hot, add in duck breasts skin side down and fry for about 4-5 minutes, or until golden brown. Flip to other side, season with salt and pepper, and cook for another 3 minutes or so. Now transfer to oven to finish cooking for about 12-15 minutes.

While the duck is cooking, we are going to make the pasta! Add pasta to boiling water and cook for about 10 minutes, or until tender. Once it is finished boiling, drain and set aside.

Now we are going to start the sauce! Coat a pan in avocado oil over medium heat. Add in white sliced scallions, garlic, and bacon. Saute until scallions are softened and bacon is crispy. Now add in pasta, eggs, and cheese. Season with cayenne pepper, pepper, and salt. Stir continuously over medium heat until sauce is thickened and creamy.

Once the duck is out of oven, let rest for about 5 minutes or so, then slice. Time to start plating! Divide pasta onto four plates, then top with sliced duck, and then garnish with green sliced scallions and fresh pepper! Devour! Enjoy!

-Juliet

Wednesday, March 16, 2016

Banana Flour Key Lime Pie Cupcakes with Lime Cream Cheese Frosting

Happy WEDO Banana Flour Wednesday!!

Clearly I cannot wait for summer to come to enjoy the warm weather; this is my second key lime flavored recipe posted within a month! Key lime desserts make you feel like you are sitting by the ocean with your toes in the sand, listening to music, and enjoying the beautiful weather. Countdown to summer!
These are one of the best gluten free cupcakes I have ever made. The texture is spot on, you won't be able to tell that they are gluten free! The key to the amazing texture; WEDO banana flour! Banana flour is an amazing gluten free flour that works just like wheat flour in so many recipes! Another awesome thing about these cupcakes is the filling I filled them with; key lime curd! When I made these, I brought them over to my Grandpa, because I know he loves key lime pie. He absolutely loved them and especially loved the filling! Key lime curd tastes just like key lime pie filling. The frosting I topped the cupcakes with also have key lime curd, lime zest, and lime juice in it! If you are craving key lime pie but can't have gluten, make these perfect cupcakes!
Remove cake from center of cupcakes..
Then fill with key lime curd!
Making the cream cheese frosting! #beautiful
Banana Flour Key Lime Pie Cupcakes with a Lime Cream Cheese Frosting
For the cupcakes;
  • 1 cup WEDO banana flour 
  • 1 1/4 cup all purpose gluten free flour blend
  • 1 teaspoon xantham gum
  • 1 1/2 teaspoon baking powder
  • 3/4 cup raw cane sugar
  • 3 eggs
  • 1/2 cup melted coconut oil 
  • 1 cup flax milk
  • 2 teaspoons vanilla extract
  • 1 teaspoon lime zest
  • 1 tablespoon lime juice
Filling and frosting;
  • 1/2 cup key lime curd
  • 2 8-ounce packages cream cheese, softened
  • 1/2 cup coconut whipped cream
  • 1 teaspoon lime zest
  • 1 tablespoon lime juice
  • 1/2 cup raw cane sugar (coconut sugar works too)
Preheat oven to 375 degrees. Grease cupcake baking pan with coconut oil.

Whisk together banana flour, all purpose flour, xantham gum, baking powder, cane sugar, and lime zest in a large bowl. In a separate bowl, whisk together oil, eggs, vanilla extract, flax milk, and lime juice. Add flour mixture to bowl and whisk until thoroughly combined. Fill cupcake pan with batter about 3/4 full. Bake for about 25 minutes, or until a toothpick comes out clean. Remove cupcakes from pan and let cool on a cooling rack.

While the cupcakes are cooling, we are going to make the frosting! Beat together cream cheese, coconut whipped cream, sugar, lime curd, lime zest, and lime juice in stand mixer for about 4 minutes, or until fluffy and thoroughly combined.

Using an apple corer, cut out the middle of the cupcakes. Fill with about 1/2 tablespoon of lime curd. Now fill a piping bag with cream cheese frosting and use a rose tip. Pipe on frosting, and repeat process until all cupcakes are frosted. Garnish cupcakes with a key lime slice and lime zest. Enjoy!

-Juliet

Monday, March 14, 2016

Dairy-Free S'mores Chocolate Bark

Oh my goodness, these delicious chocolate bark pieces will make your day. When you want good ole s'mores, but can't go camping or make a campfire, this s'mores dessert does not need a campfire, and will completely satisfy your cravings for s'mores! The chocolate is so decadent, dark, and slightly sweet, and the corn syrup free marshmallow sauce swirled into the chocolate adds an amazing toasted marshmallow taste.
 
The chocolate I use is 70% dark and dairy free, and I use coconut milk in the marshmallow sauce rather than dairy milk, which makes these s'mores chocolate park pieces completely dairy free, and gluten free! 
Before placing in fridge..
After 4 hours in fridge!
Onto the recipe!

Dairy Free S'mores Chocolate Bark 
  • 14 ounces 70% dark chocolate chips
  • 1 tablespoon coconut oil
  • 1 cup corn syrup free mini marshmallows
  • 1 cup coconut milk
  • 1 teaspoon vanilla extract
  • 5 sheets of gluten free graham crackers, chopped into medium sized pieces
First, we are going to melt the chocolate. Add chocolate chips and coconut oil to a double boiler over medium-low heat. Stir continuously until completely melted. Once melted, turn off heat. We are going to make the quick marshmallow sauce!

Melt 1/2 cup mini marshmallows with coconut milk in a double boiler over medium heat. Whisk continuously and add in vanilla extract. Stir until completely melted.

Line a cutting board with wax paper. Spread melted chocolate into a 1/2 inch rectangle using a spatula. Pour marshmallow sauce over, then swirl in making designs using a knife. Sprinkle on graham cracker pieces and leftover mini marshmallows. Place in refrigerator for about 4 hours. Once the chocolate bark has hardened and you are ready to serve, slice into triangle or any shapes. Devour! Enjoy!!

-Juliet

Thursday, March 10, 2016

Thai Peanut Shrimp Noodles

I would make this for lunch or dinner everyday if I could! It's SO yummy! I absolutely love Thai food, and this peanut shrimp noodle dish has so many delicious Thai flavors! This meal is perfectly spicy; the peanut butter helps cool down the spiciness. 

Not only is this dish absolutely delicious, it is very healthy for you as well! I made brown rice noodles, which are gluten-free, and used coconut aminos, which is a healthy alternative to soy sauce and is free of soy. 
Cooking the shrimp, eggs, vegetables..
Boiling the rice noodles!
Ready to eat!
Let's get to cooking!

Thai Peanut Shrimp Noodles

  • 1 lb peeled and detained shrimp 
  • 8 ounces brown rice noodles 
  • 1 leek, sliced
  • 2 bell peppers, medium diced
  • 3 eggs
  • 1/2 cup sliced carrots
  • 3 garlic cloves, minced
  • 1/2 cup coconut aminos
  • 1/4 cup lime juice
  • 2 tablespoons peanut butter (sunflower seed butter is a great nut-free alternative)
  • 1 teaspoon sesame oil
  • 1 tablespoon sriracha
  • coconut oil, to coat pan
  • salt and pepper, to taste
  • lime quarters, to garnish
Bring a pot of salted water to a boil. Whisk together coconut aminos, lime juice, peanut butter, sesame oil, salt, and pepper in a small bowl.

Once the water is boiling, add in brown rice noodles and boil for about 11 minutes, or until tender. While the noodles are boiling, we are going to start making the shrimp! Heat coconut oil in a large pan over medium high heat. Add in leeks and garlic, and saute until translucent. Now add in bell peppers, carrots, and season with salt and pepper. Cook for about 5 minutes, or until vegetables are softened. Add in shrimp and eggs. Let cook until shrimp turn opaque.

Once the noodles have finished boiling, pour into a pasta strainer. Add noodles to pan, along with the peanut sauce. Stir until everything is thoroughly combined and noodles are coated in sauce. Divide among 4 bowls, garnish with a lime, and devour! Enjoy!

-Juliet

Tuesday, March 8, 2016

Superfood Stuffed Roasted Acorn Squashes

These stuffed acorn squashes are full of so many superfoods; kale, spinach, garlic, bell peppers, brussel sprouts, and shiitake mushrooms. And not only are these superfoods so healthy for you, they taste delicious as well! 
This dinner is relatively easy to make! You just roast the squashes in the oven, cook the vegetables and ground chicken, and then stuff squashes with filling and top with cheese. Delicious! Now I'm hungry for this amazing dinner! 
Saute vegetables until all are cooked..
Then add in ground chicken and continue to cook!
 Let's get to cooking!

Superfood Stuffed Roasted Acorn Squashes (serves 8)

  • 4 acorn squashes
  • 1 lb ground chicken
  • 2 cups chopped spinach
  • 2 cups chopped kale
  • 1 cup shredded brussel sprouts
  • 1 cup sliced shiitake mushrooms
  • 2 bell peppers, medium diced
  • 1 onion, diced
  • 2 garlic cloves, minced
  • 8 slices of fresh mozzarella cheese
  • salt and pepper, to taste
  • chopped parsley, to garnish
Preheat oven to 400 degrees. Place all four squashes whole on a baking sheet and roast for about 40 minutes, or until soft.

While the squashes are roasting, we are going to get started on the filling! Heat coconut oil in a large pan over medium high heat. Once hot, add in onions and garlic. Saute until translucent. Add in bell peppers, brussel sprouts, and shiitake mushrooms, and cook until softened. Add in spinach and kale, and continue cooking. Season with salt and pepper.

Once the squashes have finished roasting, remove from oven and let cool until it's cool enough to handle. Slice squashes in half. Fill each halve with filling and top with a slice of mozzarella cheese. Bake for about 10 minutes, or until cheese is melted. Garnish with fresh parsley, serve, and enjoy!!

-Juliet


Friday, March 4, 2016

Gluten-Free Chocolate "Peanut Butter" Cookies

Happy Friday!! Start off your weekend with a healthier treat!
Oh my goodness, these cookies are pure perfection. First, I made a delicious crispy gluten free shortbread cookie using banana flour, then I topped it with some sunflower seed butter, and then coated the whole cookie in dark chocolate. Are you hungry yet?! When you are craving a chocolate peanut butter cookie, instead of grabbing the unhealthier choice, make these better-for-you cookies!! They are simple to make and will make your day awesome!
First, you roll out the delicious cookie dough..
Then cut them into circles and bake...
Then top them with sunflower seed butter! Yum!
The reason why I used quotations around peanut butter in the title, is because even though these cookies might taste like there is peanut butter, there isn't! I used sunflower seed butter, which makes the cookies not only gluten free, but nut free as well! I think sunflower seed butter taste just as good as peanut butter! 

Onto the recipe!

Gluten-Free Chocolate "Peanut Butter" Cookies

Shortbread cookie ingredients:
  • 1 cup gluten free all purpose flour blend
  • 3/4 cup WEDO banana flour
  • 1/2 teaspoon baking powder
  • 1/2 cup raw cane sugar (coconut sugar will work too)
  • pinch of salt
  • 3 tablespoons melted coconut oil
  • 3 tablespoons melted grass fed butter
"Peanut butter" & dark chocolate layer ingredients:
  • 1/2 cup sunflower seed butter (plus one tablespoon to melt with chocolate)
  • 1 tablespoon coconut sugar
  • 1 1/2 cups dark chocolate chips
  • 1 tablespoon coconut oil
Preheat oven to 375 degrees. Line a baking sheet with parchment paper.

Sift together all purpose blend, banana flour, salt, and baking powder in a large bowl. Beat sugar, melted coconut oil, and butter in a stand mixer. Mix in flour blend until thoroughly combined.

Roll out cookie dough into a rectangle. Cut out circles using a mason jar top. Place on baking sheet and bake for about 12 minutes, or until slightly golden and crispy. Let cool on a cooling tray.

While the cookies are cooling, we are going to start making the sunflower seed butter layer and melt the chocolate! Mix together sunflower seed butter and coconut sugar in a small bowl. Set aside. Heat dark chocolate, coconut oil, and one tablespoon of sunflower seed butter in a double boiler over medium-low heat. Stir continuously until chocolate is melted and smooth. 

Now that the cookies are cooled, we are going to start making them amazing! Place about 1/2 tablespoon of sunflower seed butter on each cookie. Spread out evenly, and once all cookies are covered, place in freezer for about 20 minutes to let the sunflower seed butter coating harden. Remove cookies from freezer, it's time to coat them in the melted chocolate! Coat tops and bottoms of cookies evenly in chocolate, and place on a parchment paper lined tray. Repeat process until all cookies are coated. Devour! Enjoy this delicious treat!

-Juliet 

Wednesday, March 2, 2016

Blackberry-Cheesecake Dark Chocolate Brownie Trifle

This dessert is SO chocolatey and delicious! If you are a chocolate lover (like me,) then you will absolutely adore this trifle! The gluten/grain free brownies have not only dark chocolate chips, but also dark chocolate chunks! The blackberry cheesecake layer is perfection. It is sweetened with a little bit of honey, which gives it a lovely flavor and makes this recipe refined-sugar free! 

 Another awesome perk to this recipe, is that the blackberry cheesecake filling requires no baking! It is super simple and quick to whip up. I just pureed the blackberries, and whipped them with cream cheese, coconut whipped cream, and honey. 
Perfection! Look at those chocolate chunks and chocolate chips! 
Onto the recipe!

Blackberry-Cheesecake Dark Chocolate Brownie Trifle 

  • 1 batch of the best gluten free brownies
  • 1 cup fresh blackberries 
  • 8 ounces cream cheese, softened
  • 1 cup coconut whipped cream
  • 1/4 cup honey
  • extra blackberries to garnish 
Bake brownies and let cool. Once fully cooled, cut brownies into small squares. Set aside.

Puree blackberries in a food processor until smooth.

Whip together cream cheese and coconut whipped cream in a stand mixer until fluffy and combined. Add in blackberry puree and honey, and mix again until thoroughly combined.

Time to assemble the trifles! Fill a small pint sized mason jar with a few brownie squares, then top with blackberry cheesecake filling, and repeat until jar is filled. Garnish with a fresh blackberry and devour! Enjoy this luscious dessert!

-Juliet